Heatsink
WARNING: To reduce the risk of personal injury from hot surfaces, allow the drives and the internal system components to cool before touching them.
CAUTION: To prevent damage to electrical components, take the appropriate anti-static precautions before beginning any installation, removal, or replacement procedure. Improper grounding can cause electrostatic discharge.
- Power down the server.
- Remove all power:
- Disconnect each power cord from the power source.
- Disconnect each power cord from the server.
- Remove the access panel.
- Place the server on its side.
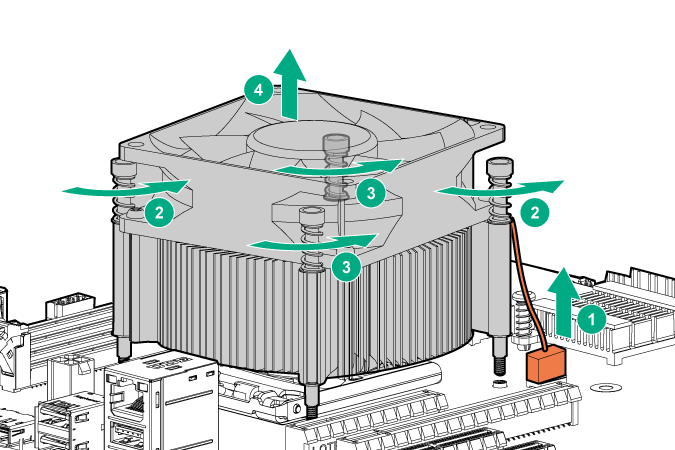
- Remove the heatsink:
- Disconnect the processor fan cable.
- Loosen one pair of diagonally opposite screws halfway, and then loosen the other pair of screws.
- Completely loosen all screws in the same sequence.
- Remove the heatsink from the processor backplate.
To replace the component:
- Clean the old thermal grease from the processor with the alcohol swab. Allow the alcohol to evaporate before continuing.
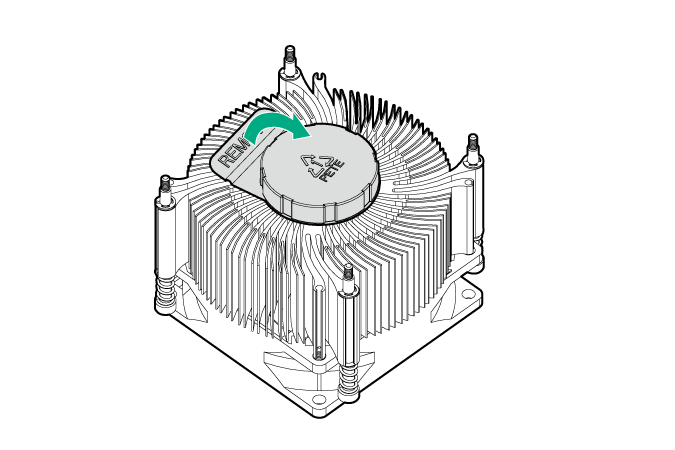
- Remove the thermal interface protective cover from the heatsink.
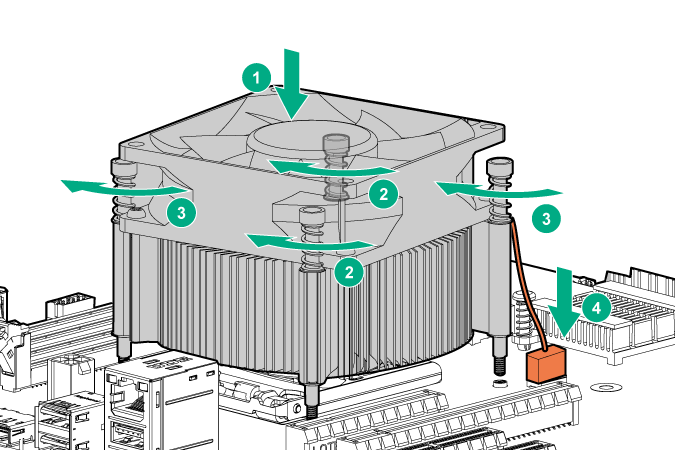
- Install the heatsink:
- Position the heatsink on the processor backplate.
- Tighten one pair of diagonally opposite screws halfway, and then tighten the other pair of screws.
- Finish the installation by completely tightening the screws in the same sequence.
- Connect the processor fan cable.
CAUTION: The fan does not have a fan guard. Special attention is needed when removing or installing the fan to prevent finger injury.
- Return the server to an upright position.
- Install the access panel.
- Connect each power cord to the server.
- Connect each power cord to the power source.
- Power up the server.