Adding a probe
Click the Service tab.
From the navigation tree, select Traffic Analysis and Audit > Settings.
The Settings page opens, as shown in Figure 3.
Figure 3: Accessing the Settings page
In the Guide to Quick Traffic Analysis And Audit Configuration area, click Probe Management.
The Probe Management page opens.
Click Add.
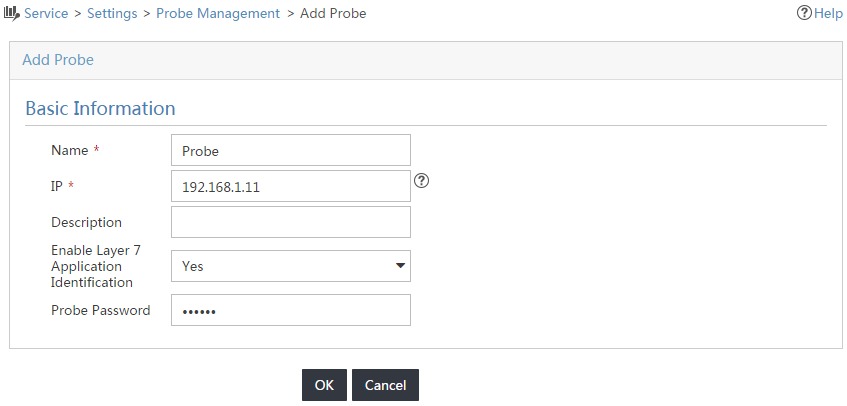
The Add Probe page opens, as shown in Figure 4.
Figure 4: Adding a probe
Configure probe parameters, as shown in Figure 4:
Enter a name in the Name field.
This example uses Probe.
Enter 192.168.1.11 in the IP field.
Select Yes from the Enable Layer 7 Application Identification list.
Enter the probe password in the Probe Password field.
Make sure the password is the same as the password configured when you install the probe.
Use the default values for the other parameters.
Click OK.
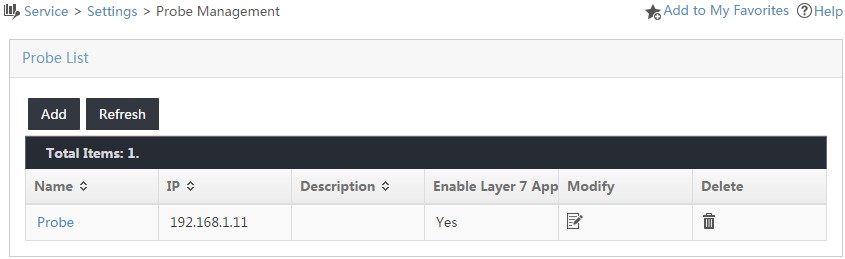
Figure 5: Viewing the created probe