e Proxy Configuration

When configuring the proxy server, the following applications will be taking the proxy route to reach the destination. You can configure the proxy server as indicated in DHCP or proxy server command.

  • Aruba AirWave
  • Aruba Activate
  • Firmware download through MNP
  • Aruba ClearPass connectivity
  • Aruba Central connectivity
  • TR69 support

Support for Aruba AirWave

AirWave is used to manage the ArubaOS-Switches and its communication to the switch is over HTTPS. When AirWave is deployed with Aruba controller, an IPsec tunnel is created between the switch and the controller. All the communication between the switch and AirWave occurs through the tunnel. In this case, the proxy is bypassed implicitly.

AirWave establishes ICMP, SNMP, and SSH connections to the switch for switch management. Since AirWave does not have the visibility for the switch IP address, the ICMP, SNMP, and SSH connections will not be initiated to the switch. So reverse NAT functionality must be enabled for ensuring these packets reach the switch. If AirWave must work without proxy, then AirWave IP is bypassed explicitly.

Support for Aruba ClearPass

For downloading a user role from ClearPass, switch initiates HTTPS connection with ClearPass. If the proxy is configured, proxy server is used to reach ClearPass. When ClearPass is deployed with Aruba controller, ClearPass must be explicitly exempted from proxy. Add the ClearPass IP address in the exception list of the proxy as the communication happens through the IPsec tunnel or normally.

Proxy Configuration using windows DHCP server

In the ZTP provisioning, you can push the Proxy server and exception configurations through a Windows DHCP server using DHCP option 148.
Procedure
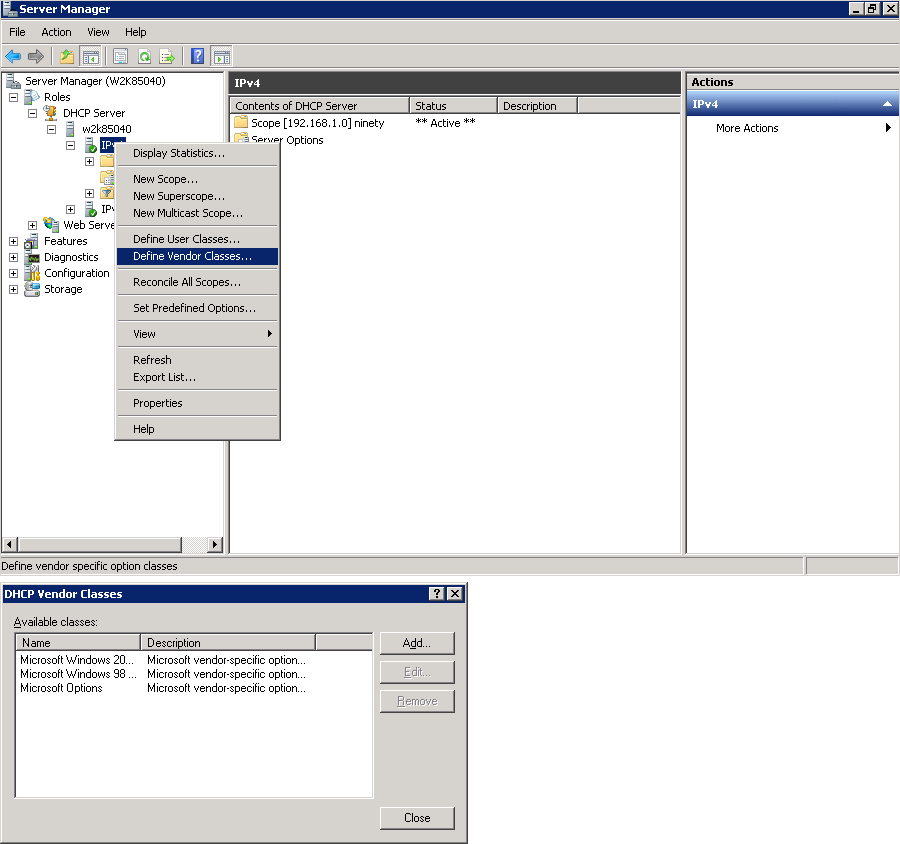
  1. Add a new DHCP Server role. Navigate to Server Manager > Roles > DHCP sever > domain DHCP Server > IPv4. In the master pane of the Server Manager window, click IPv4 and select Define Vendor classes.

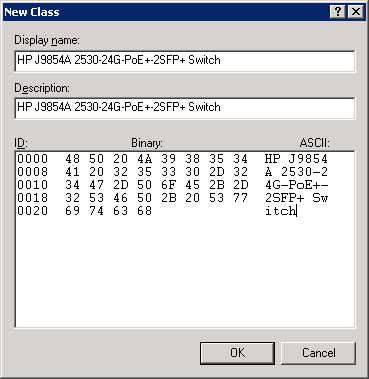
  2. To get vendor-specific value of a switch, go to switch command prompt and enter show dhcp client vendor-specific command. Vendor class identifier for the switch (VCI) appears as follows:

    Switch# show dhcp client vendor-specific

    Vendor Class Id = J9854A 2530-24G-PoE+-2SFP+ Switch

    Processing of Vendor Specific Configuration is enabled.

  3. Add Displayed name and Description for the New Vendor Class in the ASCII field, add J9854A 2530-24G-PoE+-2SFP+ Switch value exactly obtained from the switch, otherwise the option may not work.

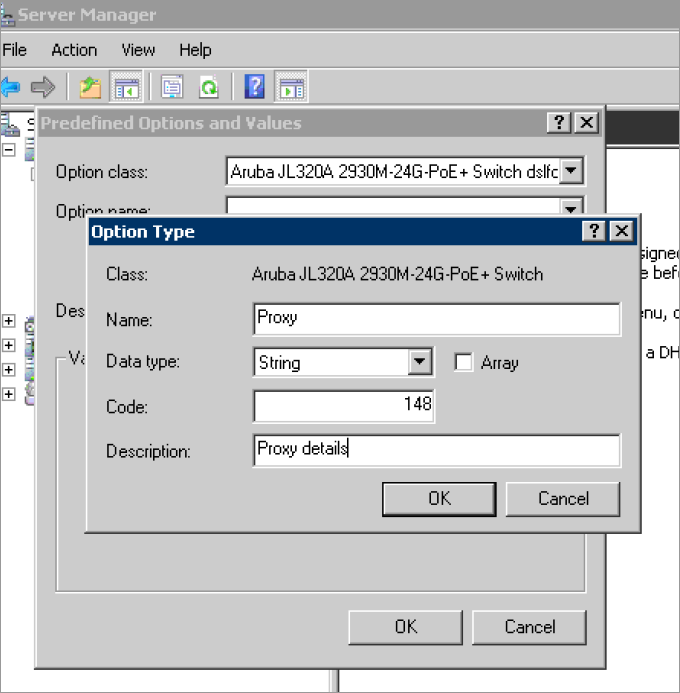
  4. Right-click IPv4 and select Set Predefined Options. Select option class as the newly defined vendor class, click ADD and enter the following information for Proxy details:
    1. Name - Proxy

    2. Data Type - String

    3. Code - 148

    4. Description - Proxy details.

    Now the new vendor class will have new suboption with code 148. Next is to add these vendor class and suboptions to the scope. To add proxy server details to scope, navigate to Server Manager and select Server Options in the IPv4 window.

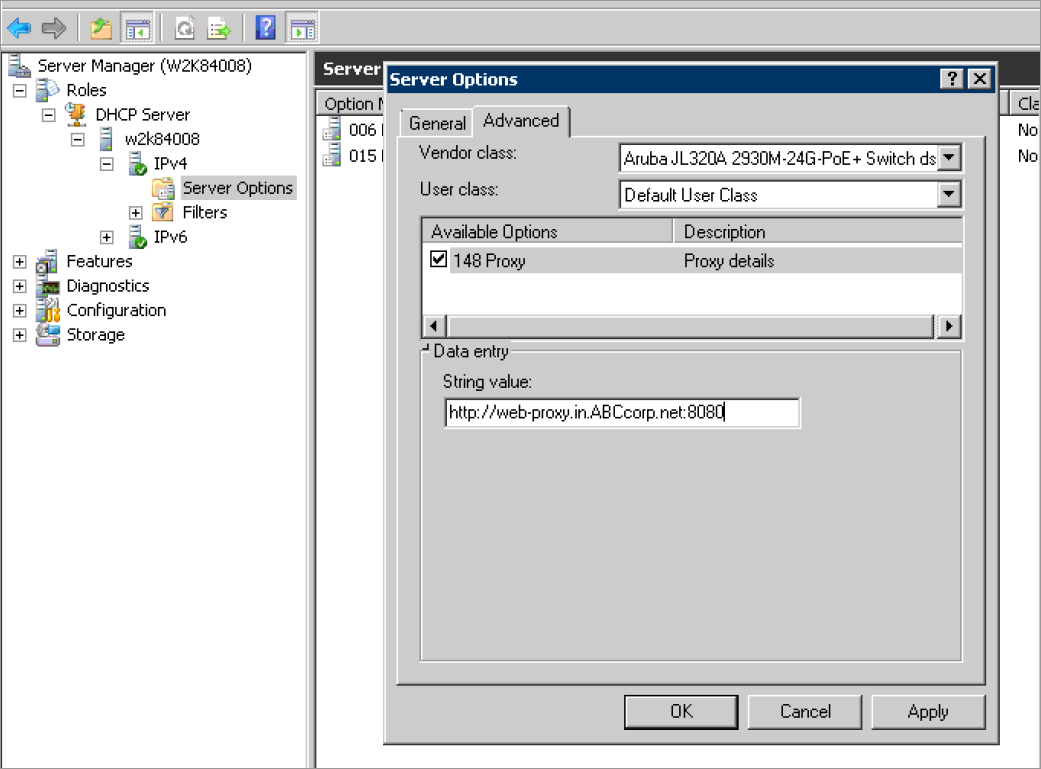
  5. Right click server options and select Configure options. Go to Advanced tab, select the vendor class from the menu as the newly defined class. New suboptions that are added appears.

    Check 148 and add Proxy details in string value field, in the format as mentioned:

    <http://web-proxy.in.ABCcorp.net:8080> or <http://192.168.50.18:3128>

    Check 144 and add configuration filename in string value field (optional).

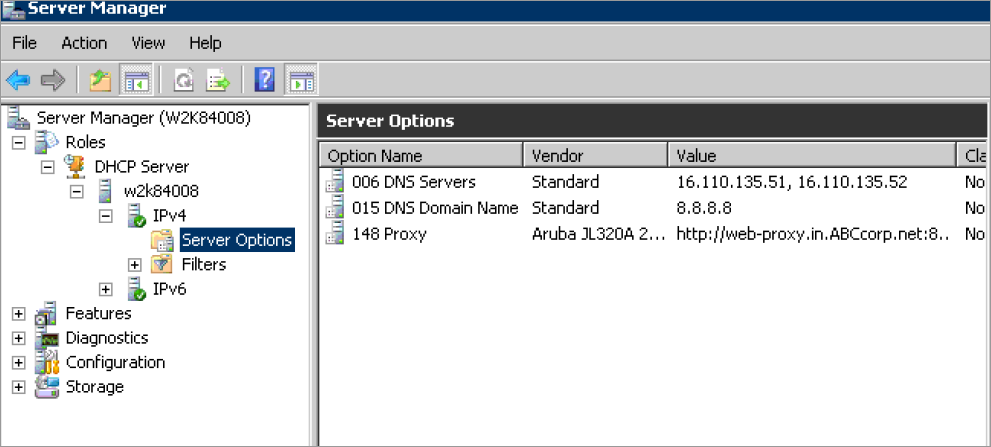
  6. Click Apply and OK and the proxy option is added in the Server options.
  7. Now restart the DHCP service and download new DHCP attributes in the switch, you can check that the proxy details are correctly downloaded in the switch using the show proxy config command.